Information access
How to view and report on energy system information.
NOTE: Always consider the Safety Precautions when using information provided by Energy Hub for decision making.
| Alarms |
| Building operations |
| Consumption and demand |
| Cost |
| Energy performance |
| Equipment status and trends |
| Greenhouse gas emissions |
| Load control |
| Miscellaneous |
| NABERS ratings |
| Normalized consumption |
| Reporting |
| Single-line diagrams |
| Tenant energy billing |
Alarms
- Inbox shows alarms for the entire organization, but only for the alarm categories and alarm priorities you have selected in the notification settings.
- Investigate shows all alarms for the location or equipment that you select in the organization tree, independent of the notification settings.
[Web app]
To view organization level alarm information:
- In Energy Hub, go to Inbox.
- View a list of alarms in the list panel.
TIP: To set the date range for the displayed information, use the date range selector in the Investigate toolbar.
- Select an alarm in the list panel and view details for the selected alarm in the details panel.
To view load specific alarm information:
- In Energy Hub, go to Investigate and select Asset view.
- In the navigation panel, find and select the load in the organization tree that you want to view alarms for.
- View alarms for the item in the display panel.
TIP: To set the date range for the displayed information, use the date range selector in the Investigate toolbar.
[Mobile app]
Site manager mode:
To view site level alarm information:
- In the Energy Hub mobile app, in Site manager mode, open the Home tab.
- View summary alarm information for the selected site.
- Tap the alarm display to open the Alarms screen. A list of active, unacknowledged alarms for the site displays.
- (Optional) Select an alarm to see the alarm details.
- (Optional) Customize the alarm filter
 to filter on load types or alarm states.
To view load specific alarm information:
- In the Energy Hub mobile app, in Site manager mode, open the Home tab.
- Swipe up for more details. The load type tabs display.
- Select the tab for the load type you are interested in, for example Refrigeration. The status tiles for the loads of this type display.
- Select the status tile for the load you are interested in. A details screen displays.
- On the details screen, select Alarms to see a list of alarms for this load.
- (Optional) Customize the alarm filter to filter on load type or alarm state.
Technician mode:
To view organization level alarm information:
- In the Energy Hub mobile app, in Technician mode, open the Inbox tab.
- View alarm information for the entire organization.
- (Optional) Select an alarm to see the alarm details.
To view load specific alarm information:
- In the Energy Hub mobile app, in Technician mode, open the Investigate tab. A list of sites displays.
- Drill down in the list and select the location (select view) or load you want to view alarms for. The Investigate screen for the selected item displays, showing alarm information.
TIP: To drill down, tap a site to see the locations and loads within it. Keep tapping locations to see child locations and loads until you find the one you are looking for.
- (Optional) Select the Active alarms tile. A list of alarms displays.
- (Optional) Customize the alarm filter to filter on alarm priority and state.
- (Optional) Select an alarm to see the alarm details.
[Web app]
- In Energy Hub, go to Investigate and select any of the views (Asset, Energy, Cost, or Electrical).
- In the organization tree, select the location that you want to view existing alarm rules for.
- In the information panel for the location, select the Alarm Settings tab. A list of existing alarm rules for this location displays.
[Mobile app]
Site manager mode:
- In the Energy Hub mobile app, in Site manager mode, open the application options menu (three lines) and select Setup. The Setup options screen displays.
- Select Alarm rules. The Alarm rules screen displays showing existing alarm rules for the selected site.TIPS:
- You can select the site on the Home screen.
- To view location-specific or load-specific alarm rules for a site, use the alarm rule filter .
- You can also view load-specific alarm rules from the load tile details by selecting a load tile on the Home screen.
- In Alarm rules, tap the rule you want to view. The alarm rule options tile displays.
- On the alarm rule options tile, select Edit alarm rule. The Edit alarm rule configuration screen displays.
- In Edit alarm rule, view the alarm rule details.
- Select the navigation arrow in the top left corner of the screen to exit the edit alarm rule screen without saving any changes.
Technician mode:
- In the Energy Hub mobile app, in Technician mode, open the application options menu (three lines) and select Setup. The Setup options screen displays.
- Under Alarm settings, select Manage alarm settings. The Alarm settings screen displays showing a list of sites.
- In Alarm settings, find and select the location or load you want to view an alarm rule for. The Alarm settings screen for the selected item displays, showing existing alarm rules.
TIP: To drill down, tap a site to see the locations and loads within it. Keep tapping locations to see child locations and loads until you find the one you are looking for.
- Find the alarm rule you are interested in, and then, from the options menu (three dots) of the alarm rule, select Edit alarm rule. The Edit alarm rule screen displays.
- View the alarm rule details.
- Select Cancel to exit without saving any changes.
Building operations
IMPORTANT: The data displayed is not in real-time. It shows the latest logged data for the equipment or monitoring device. Updates occur every 10 minutes.
[Web app]
- In Energy Hub, go to Investigate and select the Asset view.
- In the organization tree, select the refrigeration monitoring device that you want to see the information for.
- In the display panel, in Equipment status and in Trends, view the refrigeration temperature.
[Mobile app – Site Manager mode only]
- In the Energy Hub mobile app, in Site manager mode, open the Home tab and swipe up for more details.
- Select the Refrigeration tab. The refrigeration tiles display.
- View refrigeration status summaries or select a refrigeration tile to view details.
IMPORTANT: The data displayed is not in real-time. It shows the latest logged data for the equipment or monitoring device. Updates occur every 10 minutes.
[Web app]
- In Energy Hub, go to Investigate and select the Asset view.
- In the organization tree, select the emergency light that you want to see the information for.
- In the display panel, in Equipment status, view the emergency light data.
[Mobile app – Site Manager mode only]
- In the Energy Hub mobile app, in Site manager mode, open the Home tab and swipe up for more details.
- Select the Emergency Lighting tab. The emergency light tiles display.
- View emergency lighting status summaries or select an emergency light tile to see details.
[Mobile app – Site Manager mode only]
- In the Energy Hub mobile app, in Site manager mode, open the Home tab and swipe up for more details.
- Select the Emergency Lighting tab. The emergency light tiles display.
- Select the tile for the light you want to see the test dates for. A details screen displays.
- On the details screen, view the last test dates for the light.
You can also create an emergency lighting report with lighting test information in Excel or PDF format.
[Mobile app – Site Manager mode only]
- In the Energy Hub mobile app, in Site manager mode, open the Home tab and swipe up for more details.
- Select the Emergency Lighting tab. The emergency light tiles display.
- Select the tile for the light you want to see the battery code for. A details screen displays.
- On the details screen, view the battery code for the light.
[Mobile app – Site Manager mode only]
- In the Energy Hub mobile app, in Site manager mode, open the Home tab and swipe up for more details.
- Select the Emergency Lighting tab. The emergency light tiles display.
- Select the tile for the light you want to see the model number for. A details screen displays.
- On the details screen, view the model number for the light.
Consumption and demand
[Web app]
- In Energy Hub, go to Investigate and select the Energy view.
- In the organization tree, select the location or load that you want to see the information for.
- In the display panel, view consumption information.
TIP: To set the date range for the displayed information, use the date range selector in the Investigate toolbar.
[Mobile app]
Site manager mode:
To view electrical energy consumption on the Home tab,
- In the Energy Hub mobile app, in Site manager mode, open the Home tab and swipe up for more details.
- Select the tab for the load type you are interested in, for example Refrigeration. The status tiles for the loads of this type display.
- Select the status tile for the load you are interested in. A details screen displays.
- On the details screen, view energy consumption.
To view electrical energy consumption on the Energy tab,
- In the Energy Hub mobile app, in Site manager mode, open the Energy tab.
- View energy consumption for the selected site.
- (Optional) Swipe up for more details
- View energy consumption for different locations or loads.
Technician mode:
To view electrical energy, water, or fuel gas consumption
- In the Energy Hub mobile app, in Technician mode, open the Investigate tab. A list of sites displays.
- Drill down in the list and select the location or load you want to view consumption for. The Investigate Asset screen for the selected item displays, showing power system information.
TIP: To drill down, tap a site to see the locations and loads within it. Keep tapping locations to see child locations and loads until you find the one you are looking for.
- In Investigate Asset, scroll down to view consumption in the Equipment status display.
[Web app]
- In Energy Hub, go to Investigate and select the Energy view.
- In the organization tree, select the location or load that you want to see the information for.
- In the display panel, view electrical power and demand information.
TIP: To set the date range for the displayed information, use the date range selector in the Investigate toolbar.
[Mobile app]
Site manager mode:
- In the Energy Hub mobile app, in Site manager mode, open the Home tab and swipe up for more details.
- Select the tab for the load type you are interested in, for example Refrigeration. The status tiles for the loads of this type display.
- Select the status tile for the load you are interested in. A details screen displays.
- On the details screen, view electrical power information.
Technician mode:
- In the Energy Hub mobile app, in Technician mode, open the Investigate tab. A list of sites displays.
- Drill down in the list and select the load you want to view power for. The Investigate Asset screen for the selected item displays, showing power system information.
TIP: To drill down, tap a site to see the locations and loads within it. Keep tapping locations to see child locations and loads until you find the one you are looking for.
- In Investigate Asset, scroll down to view electrical power information in the Equipment status display.
[Web app only]
- In Energy Hub, go to Investigate and select the Energy view.
- In the organization tree, select the location that you want to see the information for.
- In the display panel, view consumption by business hours information.
TIP: To set the date range for the displayed information, use the date range selector in the Investigate toolbar.
[Web app only]
- In Energy Hub, go to Investigate and select the Energy view.
- In the organization tree, select the location or equipment that you want to compare.
- In the Investigate toolbar, select the date range for which you want to see energy data. The display panel shows energy information for the selected date range.
- In the header of the display area, from the comparison type selector, select Time period. The Add time period selector displays.
- From the Add time period selector, select a comparison time period to add it to the display.
NOTE: The date range selection in the date range selector in the Investigate toolbar determines which comparison time periods are available in the Add time period selector. For details, see Comparison time selector.
- (Optional) Add additional comparison periods. You can add up to 10 periods.
- View the energy comparisons in the display panel.
[Web app only]
- In Energy Hub, go to Investigate and select the Energy view.
- In the organization tree, select the location or equipment that you want to compare.
- In the Investigate toolbar, select the date range for which you want to see energy data. The display panel shows energy information for the selected date range.
- In the header of the display area, from the comparison type selector, select the location or equipment type to compare. The Add <type> control displays.
NOTE: The control gives you the option to compare with the same type of location or equipment that you selected in the organization tree. For example, if you selected a site, the control will say Add site.
- Select Add <type>. The organization tree in the navigation panel highlights compatible locations or equipment.
NOTE: You can only compare items of the same type.
- In the organization tree, select a location or equipment to add it to the display for comparison.
- (Optional) Add additional comparison locations or equipment. You can add up to 10 items.
- View the energy comparisons in the display panel.
[Web app only]
- In Energy Hub, go to Investigate and select the Energy view.
- In the header of the display area, from the comparison type selector, select (No comparison).
IMPORTANT: The data displayed is not in real-time. It shows the latest logged data for the equipment or monitoring device. Updates occur every 10 minutes.
NOTE: Heat energy and heat power are displayed in Asset view, not Energy view.
[Web app only]
- In Energy Hub, go to Investigate and select the Asset view.
- In the organization tree, select the heat monitoring device that you want to see the information for.
- In the display panel, view heat power in the Equipment status display and heat power and energy in the Trends displays.
TIP: To set the date range for the displayed information, use the date range selector in the Investigate toolbar.
Cost
NOTE: You can only view cost at the site level.
[Web app]
- In Energy Hub, go to Investigate and select the Cost view.
- In the organization tree, select the site that you want to see the cost for.
- In the display panel, view the cost information.
TIP: To set the date range for the displayed information, use the date range selector in the Investigate toolbar.
[Mobile app – Site Manager mode only]
NOTE: The mobile app only shows electrical energy cost; it does not show water and gas consumption cost.
- In the Energy Hub mobile app, in Site manager mode, open the Energy tab.
- View energy consumption cost for the selected site.
- (Optional) Swipe up for more details
- View energy consumption for different locations.
NOTE: Users with limited access permissions within the organization cannot view, create, edit, assign, or delete tariffs.
[Web app only]
- In Energy Hub, go to Investigate and select any of the views (Asset, Energy, Cost, or Electrical).
- In the organization tree, select the site that you want to view the tariffs for.
- In the information panel for the site, select the Tariffs tab. A selector for commodity options (Electricity, Gas, Water) and a list of assigned tariffs for the chosen commodity for this site display.
- Select the commodity that you want to view the tariffs for.
- The list of assigned tariffs for the commodity for the site displays.
[Web app only]
- In Energy Hub, go to Investigate and select any of the views (Asset, Energy, Cost, or Electrical).
- In the organization tree, select the site that has the tariff assigned to it that you want to view the details for, or select any site.
- In the information panel for the site, select the Tariffs tab. A selector for commodity options (Electricity, Gas, Water) and a list of assigned tariffs for the chosen commodity for this site display.
- Select the commodity for the tariff that you want to view.
- Select Edit
 . The edit controls display.
 - Find the tariff you want to view in the list of assigned tariffs, or select Assign tariff and temporarily assign the tariff to this site. For step-by-step instructions on how to assign a tariff, see To assign a tariff to a site.
- Select Edit tariff on the tile of the tariff you want to edit. The edit tariff panel displays.
- In the edit tariff panel view the tariff details.
- Select Cancel to exit the edit tariff panel without saving any changes.
- If you temporarily assigned the tariff to this site, remove it again. For step-by-step instructions on how to remove a tariff, see To remove a tariff from a site.
- Select Cancel again to exit the information panel edit mode .
NOTE: Users with limited access permissions within the organization cannot view, create, edit, assign, or delete tariffs.
[Web app only]
- In Energy Hub, go to Investigate and select any of the views (Asset, Energy, Cost, or Electrical).
- In the organization tree, select any site.
- In the information panel for the site, select the Tariffs tab. A selector for commodity options (Electricity, Gas, Water) and a list of assigned tariffs for the chosen commodity for this site display.
- Select the commodity that you want to see the available tariffs for.
- Select Edit . The edit controls display.
- Select Assign tariff. A New tariff assignment tile displays.
- In New tariff assignment, in the Tariff drop-down selector, view the list of tariffs that are available for this commodity for the organization.
- Select Cancel to exit without assigning a tariff.
- Select Cancel again to exit the information panel edit mode .
Energy performance
[Web app only]
- In Energy Hub, select Home from the main navigation bar. The Home page displays.
- On the Home page, view energy performance information.
[Mobile app – Site Manager mode only]
- In the Energy Hub mobile app, in Site manager mode, open the Energy tab.
- View energy consumption tracking information for the selected site.
- (Optional) Swipe up for more details
- View energy consumption for different locations or loads.
Equipment status and trends
IMPORTANT: The data displayed is not in real-time. It shows the latest logged data for the equipment or monitoring device. Updates occur every 10 minutes.
NOTE: The type of data that is available depends on the type of equipment and monitoring device that are providing the data. Not all equipment and devices provide status information.
[Web app]
- In Energy Hub, go to Investigate and select the Asset view.
- In the organization tree, select the asset or monitoring device that you want to see the information for.
- In the display panel, in the Equipment status display, view equipment status.
TIP: To set the date range for the displayed information, use the date range selector in the Investigate toolbar.
[Mobile app – Technician mode only]
- In the Energy Hub mobile app, in Technician mode, open the Investigate tab. A list of sites displays.
- Drill down in the list and select the load you want to view the equipment status for. The Investigate Asset screen for the selected item displays, showing load specific information.
TIP: To drill down, tap a site to see the locations and loads within it. Keep tapping locations to see child locations and loads until you find the one you are looking for.
- In Investigate Asset, scroll down to view equipment status information.
IMPORTANT: The data displayed is not in real-time. It shows the latest logged data for the equipment or monitoring device. Updates occur every 10 minutes.
NOTE: The type of data that is available depends on the type of equipment and monitoring device that are providing the data.
[Web app]
- In Energy Hub, go to Investigate and select the Asset view.
- In the organization tree, select the equipment or monitoring device that you want to see the data trends for.
- In the display panel, view the data trends in the Trends display.
TIP: To set the date range for the displayed information, use the date range selector in the Investigate toolbar.
[Mobile app – Technician mode only]
- In the Energy Hub mobile app, in Technician mode, open the Investigate tab. A list of sites displays.
- Drill down in the list and select the load you want to view trends for. The Investigate Asset screen for the selected item displays, showing load specific information.
TIP: To drill down, tap a site to see the locations and loads within it. Keep tapping locations to see child locations and loads until you find the one you are looking for.
- In Investigate Asset, scroll down to view trends.
Greenhouse gas emissions
[Web app only]
- In Energy Hub, select Home from the main navigation bar. The Home page displays.
- On the Home page, find the greenhouse gas emissions display to view emissions summary information.
- Select More insights on the display tile to see emissions details.
Load control
IMPORTANT: The data displayed is not in real-time. It shows the latest logged data for the equipment or monitoring device. Updates occur every 10 minutes.
[Mobile app – Site Manager mode only]
- In the Energy Hub mobile app, in Site manager mode, open the Home tab and swipe up for more details.
- Select the tab that represents the load type you want to see the status of, for example Lighting. The tiles for loads of this type display, for example all lighting loads.
- Select the tile representing the load you want to see the status of. The load details display.
- View the load status in the details display.
[Mobile app – Site Manager mode only]
- In the Energy Hub mobile app, in Site manager mode, open the application options menu (three lines) and select Setup. The Setup options screen displays.
- In Setup, select Load schedules. A list of the loads that can be controlled through Energy Hub displays.
- Select the load that you want to view the schedule for. The Load schedules page with existing schedules for this load displays.
- Select the schedule that you want to view. The schedule details page displays.
TIP: You can also view load schedules in Site manager mode, from Home > (load type tab) > load tile for the load you want to view the schedule for. Select the load tile to open the details page and then select Load schedules, then the schedule you want to view.
Miscellaneous
[Web app]
- In Energy Hub, go to Setup > Subscription.
- On the Manage subscription page, find detailed information on your current subscription.
[Mobile app]
Site manager mode:
NOTE: Site manager mode displays a newer, feature plan-based view of subscription details.
- In the Energy Hub mobile app, in Site manager mode, open the application options menu (three lines) and select Setup. The Setup options screen displays.
- In Setup, select Subscription. The Manage Subscription screen displays.
- In Manage subscription, view subscription details.
Technician mode:
NOTE: Technician mode shows an older, application module-based view of subscription details.
- In the Energy Hub mobile app, in Technician mode, open the application options menu (three lines) and select Setup. The Setup options screen displays.
- In Setup, under Organization setup, select Manage subscriptions. The Manage subscriptions screen displays.
- In Manage subscriptions, view subscription details.
[Web app]
- In Energy Hub, in the application header, select Support Center
 . The Support Center panel displays.
 - In Support Center, select the Terms of Use link to view the terms of use agreement.
To view the Terms of Use from outside Energy Hub, in a web browser, open the Terms of Use (PDF).
[Mobile app]
- In the Energy Hub mobile app, open the application options menu (three lines) and select Legal information. The Legal information options screen displays.
- Select Terms of use. The terms of use display.
[Web app]
- In Energy Hub, in the application header, select Support Center . The Support Center panel displays.
- In Support Center, select the Privacy Notice link to view the privacy notice.
[Mobile app]
- In the Energy Hub mobile app, open the application options menu (three lines) and select Legal information. The Legal information options screen displays.
- Select Privacy notice. The privacy notice displays.
[Web app only]
- In Energy Hub, go to Setup > System setup.
- In the organization model in the configuration area, find the site with the virtual device that you want to see details for and select Configure site. The Configure site screen displays.
- In Configure site, in Asset view, find the virtual device that you want to see details for.
- From the options menu (three dots) for the virtual device, select View allocation details to see the virtual device details.
NABERS ratings
[Web app only]
- In Energy Hub, select NABERS from the main navigation bar. The NABERS content panel displays showing the NABERS ratings manager.
- In the NABERS ratings manager, in the list panel, find the building that you want to view ratings for.
- Select the building. The ratings for this building display in the building rating results panel.
[Web app only]
- In Energy Hub, go to NABERS.
- In the NABERS ratings manager, in the list panel, find the building that you want to view rating details for.
- Select the building. The ratings for this building display in the building rating results panel.
- In the building rating results panel, find the rating that you want to view details for.
- Double-click the rating or select View rating details from the options menu (three dots) for the rating. The rating details display.
Normalized consumption
[Web app only]
- In Energy Hub, go to Investigate and select the Energy view.
- In the organization tree, select the location that you want to see the information for.
- In the display panel, view intensity information.
TIP: To set the date range for the displayed information, use the date range selector in the Investigate toolbar.
[Web app only]
- In Energy Hub, go to Investigate and select the Energy view.
- In the organization tree, select the location that you want to see the weather normalization for.
- In the display panel, view energy consumption normalized by degree days.
- To set the date range for the displayed information, use the date range selector in the Investigate toolbar.
- You can also view weather normalized consumption ranking on the Home page.
Reporting
[Web app]
- In Energy Hub, go to Investigate and select the view you want to create a report from.
NOTE: Not all views support report printing.
- In the organization tree, select the location that you want to create the report for.
- In the display panel, select the printer icon at the top of the panel. The print preview page opens.
- In Print preview, select the desired print settings.
- Select Save to save the report as a PDF output, or select Print for a print output.
[Mobile app]
In the mobile app, you can generate reports for specific applications, such as refrigeration monitoring or emergency lighting.
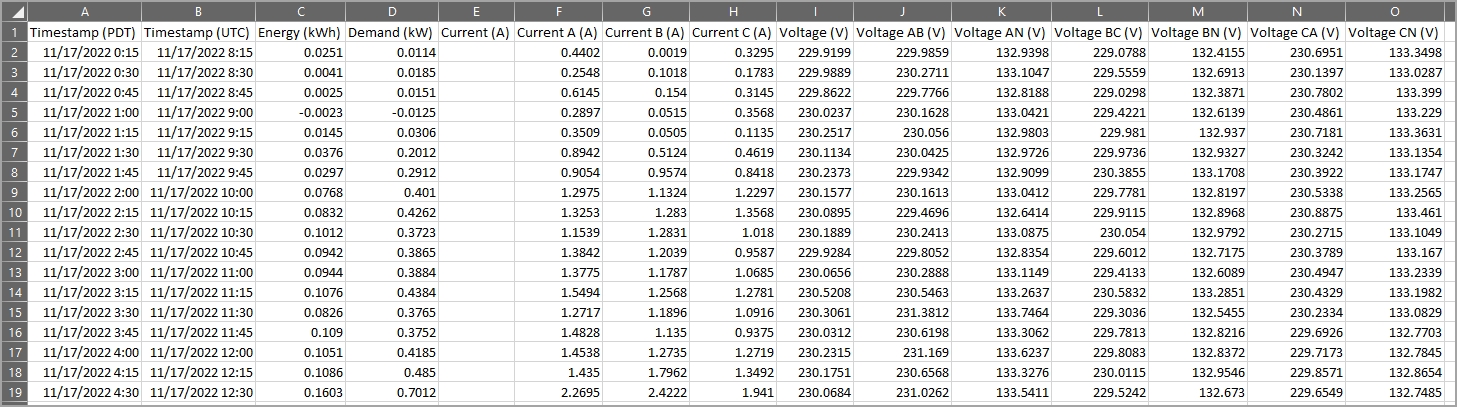
NOTE: Energy Hub uses commas for CSV delimiters and points for decimals. This causes issues with Microsoft Excel in regions that use semicolons for delimiters and commas for decimals.
[Web app only]
- In Energy Hub, go to Investigate and select the view you want to export data from.
NOTE: Not all views support exporting data as CSV files.
- In the organization tree, select the location that you want to export the data from.
-
- To export data for all data displays on the page, select the CSV export icon at the top of the panel, if available. The CSV file automatically downloads into the local Windows Downloads folder.
NOTE: Not all views have a CSV export icon to download data for all displays.
- To export data for a specific data display, in the options menu (three dots) for the display, select Export data as CSV file, if available. The CSV file automatically downloads into the local Windows Downloads folder.
NOTE: Not all data displays have an Export data as CSV file option.
- To export data for all data displays on the page, select the CSV export icon at the top of the panel, if available. The CSV file automatically downloads into the local Windows Downloads folder.
[Mobile app – Site Manager mode only]
- In the Energy Hub mobile app, in Site manager mode, open the Home tab and swipe up for more details.
- Select the Refrigeration tab. The refrigeration status tiles display.
- Select the status tile for the refrigeration equipment you want to generate a report for. A details screen displays.
- On the details screen, select Generate report. The Generate report dialog displays.
- In Generate report, specify the date range and report output format and select Generate. The Generating report progress indicator displays.
- When completed, the report displays.
- (Optional) Share the report with you contacts or with other applications.
[Mobile app – Site Manager mode only]
- In the Energy Hub mobile app, in Site manager mode, open the Home tab and swipe up for more details.
- Select the Emergency Lighting tab. The emergency light tiles display.
- On the Emergency Lighting tab, select Generate report. The Generate report dialog displays.
- In Generate report, specify the report output format and select Generate. The Generating report progress indicator displays.
- When completed, the report displays.
- (Optional) Share the report with you contacts or with other applications.
[Web app only]
- In Energy Hub, go to NABERS.
- In the NABERS ratings manager, in the list panel, find the building that you want to download a rating report for.
TIP: If the building does not exist, see To add a building to the NABERS building list to learn how to add a building and create a rating.
- Select the building. The ratings for the building display in the building rating results panel.
- In the building rating results panel, find the rating that you want to download a report for.
- In the table row for the rating, select the PDF icon
 in the Report column. The rating report downloads and opens in a new browser window.
NOTE: Always finish bill runs before downloading bills to send to your tenants. Do not send bills from bill run previews.
[Web app only]
- In Energy Hub, go to Tenant Billing.
- In the bill run editor, in the bill run list on the left, find the bill run that you want to download bills for.
- Select the bill run. The bill run results page displays.
- On the bill run results page, find the tenant in the tenant table that you want to download a bill for.
- In the table row for the tenant, select the PDF icon in the Bill (Preview / Finished) column. The bill downloads and opens in a new window.
TIP: To download all tenant bills for this bill run, select Download all bills below the tenant table.
[Web app only]
Energy Hub generates tenant bills, but it does not send them out to your tenants. To send bills to your tenants, download the bills and then use your preferred method of communicating with your tenants, such as email, to send them.
Single-line diagrams
IMPORTANT: The data displayed is not in real-time. It shows the latest logged data for the equipment or monitoring device. Updates occur every 10 minutes.
NOTE: Always consider the Safety Precautions when using information provided by Energy Hub for decision making.
[Web app only]
- In Energy Hub, go to Investigate and select the Electrical view.
- In the navigation panel, find and select the site that you want to view the single-line diagram for. Site specific information displays in the main display panel.
- If the single-line diagram does not already display, use the drawer control
 at the top of the display panel to open the single-line diagram.
Tenant energy billing
[Web app only]
- In Energy Hub, go to Tenant Billing.
- In the bill run editor, in the bill run list on the left, find the bill run that you want to see the information for.
- Select the bill run. The bill run results page displays.
- On the bill run results page, select the different bill run sections (Bills, Tariff and rates, Bill run details) to see the information.
[Web app only]
- In Energy Hub, go to Tenant Billing.
- In the bill run editor, in the bill run list on the left, find the bill run that you want to see details for.
- Select the bill run. The bill run results page displays.
- On the bill run results page, find the tenant in the tenant table that you want to see bill calculation details for.
- In the table row for the tenant, select the options menu (three dots), and then select View calculation details. The bill calculation details display.